Showing posts with label Custom BOB. Show all posts

Tuesday, May 1, 2012

Custom BOB Project - Update #9


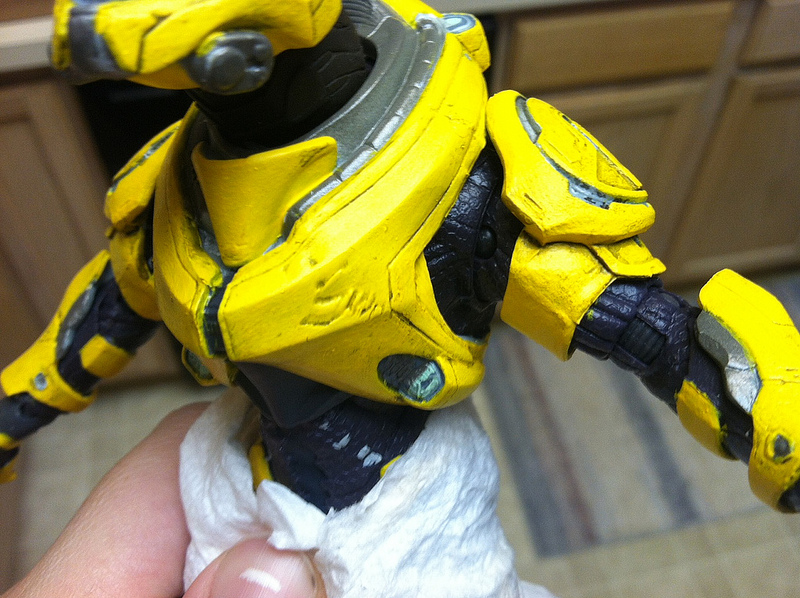
Paint on both arms is now complete. Also got the first coat put on the front side of the torso. Next session will be coat 1 on the back of the torso, then another session each to finish both sides. After that will be the helmet and then I can move on to final detailing!!!

Related Blogs:
Custom BOB Project! 
Custom BOB Project - Update #1
Custom BOB Project - Update #2 
Custom BOB Project - Update #3
Custom BOB Project - Update #4 
Custom BOB Project - Update #5 
Custom BOB Project - Update #6
Custom BOB Project - Update #7
Custom BOB Project - Update #8

Wednesday, February 22, 2012

Custom BOB Project - Update #7


Color on both legs and the waist armor is now done! He's really starting to look like a BOB now...I'm so excited! SQUEE! lol. I'm also officially half way through on the color! w00t! Next up will definitely be the arms.

Also, I just recently acquired the last two things that I needed for my next custom figure project. I have all parts, including weapons, and all paint standing by hehe...

Related Blogs:
Custom BOB Project!
Custom BOB Project - Update #1
Custom BOB Project - Update #2
Custom BOB Project - Update #3
Custom BOB Project - Update #4
Custom BOB Project - Update #5
Custom BOB Project - Update #6

Thursday, January 19, 2012

Custom BOB Project - Update #5


2nd and I think final coat of color has been applied to the armor bits. I'm about 98% satisfied with it. Unfortunately, some of the darkness of the original armor color shows through still. The paint coverage is not quite what I would have liked, but the truth is no one will ever see it unless they got up really close, and even then, after 2 coats primer and 2 coats color, its darn near perfect. Maybe I should have applied a 3rd primer coat, or I should apply a 3rd color coat, but that is getting into the territory of 5+ coats. Have to be careful applying too much paint because at a certain point it becomes more susceptible to chipping. Since my figures are for display, and I don't seal them, I have to pay particularly careful attention to the chipping factor. Really I think its just me being picky, as the artist doing the work. You always find something you wish you could have done better, right? After I dirty the armor up with the wash at the end it probably won't even matter anyway. We'll see.

Related Blogs:
Custom BOB Project!
Custom BOB Project - Update #1
Custom BOB Project - Update #2
Custom BOB Project - Update #3
Custom BOB Project - Update #4

Tuesday, January 17, 2012

Custom BOB Project - Update #4


It's a bird! It's a plane! It's...a BOB-trooper??? LOL

As you can see, priming on BOB is FINALLY complete!!! YAY! Next stop is application of color, which has me very, very excited. I'll be starting on the couple of detachable armor pieces first, then moving on to BOB himself. Then after color comes the wash/dry brushing phase to add detail and 'grit' to his armor. That step should be much easier with the thinner. The stuff I got should work better for breaking the surface tension of the solution than plain old water does. Should help it seep into all the little nooks and crannies real nicely. And of course the thinner has worked miracles with getting my brushes clean. YAY! No more wrecked brushes! Just goes to show you that it doesn't pay to try and skate by cleaning with just water.

I was also fortunate enough to find one of the weapons packs the other day...So completed BOB will have his concussion rifle! YAY!!! It also gave me the DMR I need for my next project...hehehe...

Related Blogs:
Custom BOB Project!
Custom BOB Project - Update #1
Custom BOB Project - Update #2
Custom BOB Project - Update #3


UPDATE: Things are starting to look BOB-like! Coat number one on the detachable armor bits is done - after another coat or two, I think its going to look perfect. The yellow I picked out couldn't have been any better.

Tuesday, November 15, 2011

Custom BOB Project - Update #3

My 0 brush is still holding! lol. Priming is now finished on the left arm. Right arm will be next. Lower body and one arm done. One arm, torso, and helmet to go! Then we can start with the color MUAHAHAHAHA lol.


Related blogs:
Custom BOB Project! 
Custom BOB Project - Update #1
Custom BOB Project - Update #2

UPDATE 12/14: I know it's been a while since this last post...Never fear, friends. I'm still working on BOB, but I've been busy with other things and I also had to wait for some supplies I needed. I have the first coat of primer on the front of the torso now...pics when the torso is done!

UPDATE 1/15/12: I had another hold up while I waited for more supplies, mainly brushes and thinner as well as more primer. Happy to report I was able to make the order and now have it in hand. A real update should be on the way soon!

Saturday, November 12, 2011

Custom BOB Project - Update #2

I've used the replacement brush a couple times now and things seem to be holding up ok. Maybe the one that self-destructed was just a dud. I have high hopes of making it to the end of this BOB project without needing to order more brushes. Fingers crossed! Then I can order new brushes, thinner, and paint when its time for my next project. I acquired some critical pieces for that next project the other day, which I was so excited about that I am STILL doing a happy dance. Anyways, back to BOB...


Primer is finished on his waist/backside armor, which means his bottom half is officially finished being primed! The arms/hands have gone a little different than I planned. I had a lot of paint left over on my palette after I finished the first coat on the forearm, so I went ahead and did the hand next and then the upper arm before putting the final coat on the waist/backside. It wasn't a problem to do the entire arm and hand at once, so I'll do the other side the same way after I finish the current arm. Turns out that I didn't need to be worried about painting the tiny finger armor plates - the 0 brush I'm using handled it perfectly! I'm still not sure what I want to do after the arms are finished. I had planned to do the helmet first, but now I am thinking I might do the torso first. Practically I don't think it really matters much. More a question of what will satisfy my OCD LOL.

That's all for now. I'll be back soon!

Related blogs:
Custom BOB Project!
Custom BOB Project - Update #1 

Friday, November 11, 2011

Custom BOB Project - Update #1

Things are coming along slow but steady. Can't say its been totally smooth though. I killed my main brush somehow. Totally fried and split. Ugh. I have another one that is a slightly different size that is uncontaminated so fortunately I can use it for white/white primer, but its not ideal. Its meant for super small detail so it takes longer to paint the large areas with. If I can just make it to the end of the project without having to order another brush, I'll be happy. Definitely need to replace the ruined brush and get some acrylic thinner before my next project though. *sigh*

Priming is finished on the lower legs, butt armor (lol), and on the jetpack. First coat has been applied to the waist and backside piece (the butt armor goes over the backside piece). I will put the second primer coat on the waist/backside tomorrow, and then I'll probably be taking a break as I've got other things going on over the weekend. The plan once I get settled back into doing more painting is to prime each of the arms next, then the helmet, and the torso last. Not sure how many stages it will take to do the arms, but I'm thinking it'll be one arm at a time, maybe upper and forearm to completion, giving them one coat per session over two sessions, then the hand to completion over two sessions, then same on the other arm.

Related blogs:
Custom BOB Project! 

Tuesday, November 8, 2011

Custom BOB Project!

Guys, I'd like to introduce you to Mr. Ranger Elite. This awesome little fellow is the subject of my latest figure customization project! Those of you that were around for last time know that my last project, recreating my Halo 3 spartan, was a huge success. I very much enjoyed the process, painstaking as it was, and I have been very much looking forward to an opportunity to do another custom. That's where Mr. Ranger Elite here comes in. This latest project will turn this little guy into none other than...
...This. That's right. That gold Ranger Elite that we so LOVE to wipe out, BOB! As many of my Halo friends can attest, I developed an almost fanatical obsession with wiping out BOBs that started after one of these guys RUINED a perfect speed run by making me roll my truck. From that moment, it was ON. A rather hilarious video of myself and my buddy Laraxa abusing the Winter Contingency BOBs followed, and every time a BOB hunting challenge comes along, we relish the chance to hunt and kill BOB. So yeah BOB has become a special iconic figure in my Halo Reach career, and it is with great pleasure that I will now get to recreate him by customizing a Ranger Elite figure.

I was thrilled to discover that not only my figure, but also the paint, arrived today! Here's the first of many in-progress pictures I will post as I work through this BOB project:
Here we see Mr. Ranger Elite all cleaned up and drying out in prep for the paint test I will do later this evening. Just going to apply a bit of the yellow to one of the toe armor plates, then let it dry to see how it looks. The yellow looks way bright in this photo, but its actually more the color of a road sign which should be perfect. If its a little bright, it should look better once the black wash is applied to dirty it up. If the paint test goes well, the jetpack will be the next thing. I'll paint and finish it completely with the wash as a sort of test for the rest of the figure.

Anyway, that's all for now. I'll update later with a pic of the paint test.


UPDATE

As you can see, the paint test did not go the way I hoped. Mr. Ranger Elite will have to get the full white primer coat treatment. The good news is that when applied on clean white, the yellow is a lot more golden than it looks here. When all is said and done I should have a near perfect BOB.
  Primer coat #1 applied to toes, lower legs and jetpack. This should help the yellow look the way its supposed to. But its about 3 times more work! lol.